


INSTALLATION INSTRUCTIONS
Installation on a wall

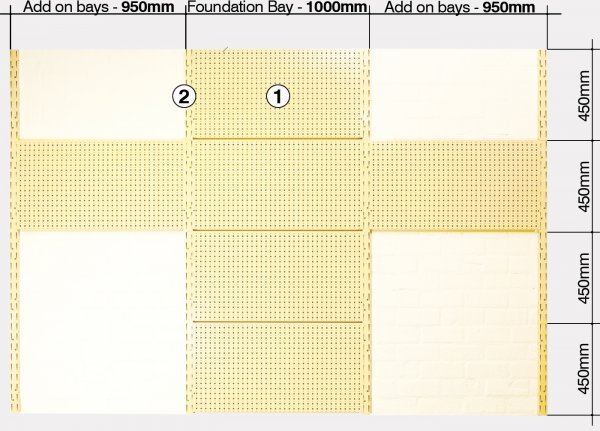
Step 1-2: Mount the foundation panel
Step 3-4: Mount the add-on panel
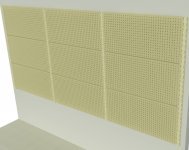
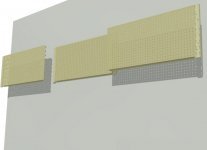
Step 5-6: Add rows above or below
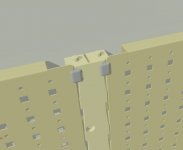
Step 5/7: showing lugs for adding rows above or below; showing Panel Plug to be inserted into top slot
- Leave the supports on the side of the panel to get accurate locations for your wall anchors.
- Hold the FOUNDATION PANEL against the wall and locate using a tape measure and a spirit level. Mark the hole locations and drill:
Dry-wall anchors: 6mm hole;
Timber Screws: 3mm hole.
Anchor the first panel in place. - Remove a support from the side of the ADD-ON PANEL.
Connect this panel to the side of the first panel already mounted.
Mark the holes, remove the panel and drill. Anchor the panel in place. - Repeat step 3 for all ADD-ON PANELS along the first row.
- to add a row above or below the first row, mount a FOUNDATION PANEL against the top or bottom of one of the panels in the previously completed row, using the locator lugs on the supports.
Repeat the step 2 mounting procedure. - Repeat the step 3 mounting procedure to complete the row.
- Ensure that the panel plug is clipped into the top slot for each panel to ensure the panel does not come loose.
Installation in a cabinet
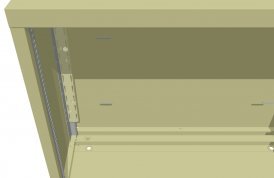
Step 1: Detail of supports located on column
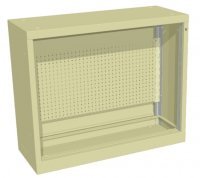
Step 2: Attach the panel to the support columns within the cabinet
- When the panel is to be mounted within a cabinet, take the two-panel supports and slot them over the support column at the rear of the housing. Anchor in place using the tapered pins supplied.
- Attach the panel to the supports and anchor in place using panel plugs.
Important Installation Information
- Use the correct wall anchor for your wall type.
- Ensure your mount the panel using all of the anchor locations on the support bracket.
- Always remember to clip in the panel plug.